The simplest way to express the difference between mending and alterations is this: if you mend something you're returning it to the way it once was. If you're making an alteration then you're changing it in some way but you still have the basic garment. (If you want to turn it into something completely different that's called refashioning.)
So if your favorite jeans have a tear in the knee you can...
Learn how to fix the tear in my Basic Mending class at the Sew-op on September 27th from 10-12. Or...
Learn how to alter the jeans into cut-offs in Rebecca's Alterations class at the Sew-op on September 29th from 5:30-7:30.
Hope to see you there!
Showing posts with label Jennifer Lynn. Show all posts
Showing posts with label Jennifer Lynn. Show all posts
Friday, September 12, 2014

Sunday, July 27, 2014
Fast Summer

Meanwhile, the Sew-op is having a tag sale on August 1st from 4-6 (same as First Friday) and August 2nd from 10-2. There will be sewing machines, fabric, knitting needles, yarn and notions available at a great price. All proceeds support the sew-op workroom and classes.
And for a fast project, try making the little guy above. He doesn't exactly fit with the theme of reuse since his body is a new car washing mit from the dollar store, but he's awfully cute and an easy project for a child to make. The tutorial is an oldie but goodie at Darling Petunia. Our hedgie was made by my daughter and is going to our favorite two-year-old who is moving away.
Happy Summer!
Sunday, July 13, 2014
A Requiem for the projects I will not be completing
There are two types of projects: the ones we finish and the ones we don't.
Like all these jokes, this is both an oversimplification and a truth. We all have projects that sound so good in the abstract but somehow never get completed. Or even started. The ones we carry around like baggage: Someday I'm going to... The ones that nag at us with their presence. The dreams in our head that clutter the path for the projects that we can complete.
So this post is my chance to send some of these projects on their way and thank them for coming. I've upgraded the storage and work surfaces in my studio and while I have lots more space than I did, I only have room for the projects I will actually do. Here is what I'm sure is only the first list of projects that I won't be completing.
And so it goes: this project may come around again, but for now, I'm letting it go.
Why I like it: Trash to treasure, cute storage, stuff on hand.
Why it won't work: Sure, I could make all my studio storage out of this stuff. I need boxes for all the cubbies of my new storage system. But stuff needs to be stored by next week and I have a family to take care of and a house to clean. So it's purchased boxes for me.
And so it goes: Life as a parent and person who loves magazine subscriptions mean that I'll always have a ready supply of material for this one. Maybe someday the stars will align and I'll be ready to do it. Perhaps when my daughter goes off to college in 10 years we can make things from all those school brochures.
Project: Bowls made of shredded magazines/IKEA instruction manuals/catalogs.
Why I like it: Trash to treasure, cute storage, stuff on hand. (At least I'm consistent.) Back when I was running the catalog fundraisers at my daughter's school, I was tempted to create beautiful art from all the extra catalogs, envelopes and papers. So very Pinteresty and a sly kick at the fundraisers that encourage you to buy overpriced junk to support your child's public education. Never happened. I'm sure I could use an attactive bowl on my bookshelf/dresser/coffee table. [Oooh! I do need a bowl for my night table.] [Ahem!] [Sigh.]
Why it won't work: time and need. Night table bowl notwithstanding.
And so it goes: Yep, this one won't quite die yet. A bowl is a small project. Maybe it will get done during summer craftiness. But it's last on the list. I have bigger fish to fry.
Project: Alabama Chanin clothing
Why I like it: These clothes are stunningly beautiful. I enjoy hand embroidery and the idea of sewing a garment entirely by hand. And I like the idea of a long-term project like this for trips.
Why it won't work: As beautiful as these clothes are, they're not my style. An they're an enormous amount of work. I think a car/plane project should be something I'm capable of finishing in a season. Something small that will fit in a carry-on bag. Plus I just can't seem to get around to buying supplies for a project and the kits are more than I'd like to pay.
And so it goes: I do love hand sewing so I will probably use the patterns as inspiration in other projects.
Why it won't work: Great idea but lots of knits. And all are so different it's tough to work them all in to one quilt. And it's a big project for a first quilt. Maybe I will work bits into future quilts so each quilt I make has a little piece of my daughter's babyhood but no designated memory quilt. (oooh, that's actually a great idea... Sort of a signature... Always in the same place. Hmmmm.)
Like all these jokes, this is both an oversimplification and a truth. We all have projects that sound so good in the abstract but somehow never get completed. Or even started. The ones we carry around like baggage: Someday I'm going to... The ones that nag at us with their presence. The dreams in our head that clutter the path for the projects that we can complete.
So this post is my chance to send some of these projects on their way and thank them for coming. I've upgraded the storage and work surfaces in my studio and while I have lots more space than I did, I only have room for the projects I will actually do. Here is what I'm sure is only the first list of projects that I won't be completing.
Project: Stitched, woven basket out of newsprint paper.
Why I like it: Trash to treasure. This is a major theme of many of my projects and interests. The whole Yankee thing of using what you have to fill a need. And cute storage, ta boot. How cool would it be to have awesomely useful baskets made from IKEA packaging I already had on hand! So tempting!
Why it won't work: I just have no need for that kind of storage right now.And so it goes: this project may come around again, but for now, I'm letting it go.
Project: Baskets made from rolled magazines/IKEA instruction manuals/catalogs.
Why I like it: Trash to treasure, cute storage, stuff on hand.
Why it won't work: Sure, I could make all my studio storage out of this stuff. I need boxes for all the cubbies of my new storage system. But stuff needs to be stored by next week and I have a family to take care of and a house to clean. So it's purchased boxes for me.
And so it goes: Life as a parent and person who loves magazine subscriptions mean that I'll always have a ready supply of material for this one. Maybe someday the stars will align and I'll be ready to do it. Perhaps when my daughter goes off to college in 10 years we can make things from all those school brochures.
Project: Bowls made of shredded magazines/IKEA instruction manuals/catalogs.
Why I like it: Trash to treasure, cute storage, stuff on hand. (At least I'm consistent.) Back when I was running the catalog fundraisers at my daughter's school, I was tempted to create beautiful art from all the extra catalogs, envelopes and papers. So very Pinteresty and a sly kick at the fundraisers that encourage you to buy overpriced junk to support your child's public education. Never happened. I'm sure I could use an attactive bowl on my bookshelf/dresser/coffee table. [Oooh! I do need a bowl for my night table.] [Ahem!] [Sigh.]
Why it won't work: time and need. Night table bowl notwithstanding.
And so it goes: Yep, this one won't quite die yet. A bowl is a small project. Maybe it will get done during summer craftiness. But it's last on the list. I have bigger fish to fry.
Project: Alabama Chanin clothing
Why I like it: These clothes are stunningly beautiful. I enjoy hand embroidery and the idea of sewing a garment entirely by hand. And I like the idea of a long-term project like this for trips.
Why it won't work: As beautiful as these clothes are, they're not my style. An they're an enormous amount of work. I think a car/plane project should be something I'm capable of finishing in a season. Something small that will fit in a carry-on bag. Plus I just can't seem to get around to buying supplies for a project and the kits are more than I'd like to pay.
And so it goes: I do love hand sewing so I will probably use the patterns as inspiration in other projects.
Project: A memory quilt made out of my daughter's old clothing
Why I like it: I've been saving my favorites of my daughter's clothing for years in the hopes of making a memory quilt. (But stay tuned, I'm learning and will be teaching a couple of classes at the Sew-op this year.)Why it won't work: Great idea but lots of knits. And all are so different it's tough to work them all in to one quilt. And it's a big project for a first quilt. Maybe I will work bits into future quilts so each quilt I make has a little piece of my daughter's babyhood but no designated memory quilt. (oooh, that's actually a great idea... Sort of a signature... Always in the same place. Hmmmm.)
And so it goes: I've got a plan now for all those baby clothes and I think it will be a nice way of spreading around the memories.
So there's my list. Say your own farewells to projects in the comments.
So there's my list. Say your own farewells to projects in the comments.
Friday, June 27, 2014
July's Craft Challenge: Tee Shirt Rehab
Welcome to second UV Craft Challenge. We are inspired by Just Crafty Enough's Iron Craft challenges to create our own. Here at Upper Valley Fiber Crafts we host a quarterly challenge for anyone to join in. Sometimes there will be a theme and sometimes there will be a specific craft. We'll post our own interpretations of the challenge here at the blog and at the end of the month we'll have a round-up for you to show off your project.
Summer is here and school is finally out. It's probably safe to swap your wintery woolens for summery tees. Each season I inevitably find that time in storage has not been kind to at least one tee. Maybe a grease stain magically appeared, or a tear, or it's too worn to be worn. Or maybe it's just too boring. A quick Google search or glance at Pinterest will show you oodles of ideas for making a tee shirt wearable again.
For this month's challenge I'd like you to choose a tee shirt to rehab and turn it into something wearable or usable by the end of the month. There are four categories of techniques you can use to transform your tee.
Here are some ideas to get you started:
For this month's challenge I'd like you to choose a tee shirt to rehab and turn it into something wearable or usable by the end of the month. There are four categories of techniques you can use to transform your tee.
- Alterations (make the tee shirt fit better or differently)
- Decorations (embelishments)
- Repurpose as a different garment
- Repurpose as a different object
Here are some ideas to get you started:
Alterations
Take an oversized shirt and alter it for style and fit.
Or change the neckline.
Decorations
You could use this fabric dot patch technique or paint to strategically cover stains or mended holes. Many dots make the design look intentional.
Or copy a high-end tee. There's also an opportunity here to hide stains and mends.
Repurpose: New Garment
Like a cute headband.
Or a ruffled scarf.
Here's a cute toddler dress.
Repurpose: New Object
Make a cozy for your morning cup of tea.
Be sure to check out my Tee Shirt Rehab Pinterest page as well. I have many great ideas pinned that contain dead-end links but the pinned picture contains enough info to give you an idea and get you started.
We'll be posting our own ideas for this challenge. Post a comment if you will be following this challenge. I can't wait to see what you come up with.
We'll be posting our own ideas for this challenge. Post a comment if you will be following this challenge. I can't wait to see what you come up with.
P.S. This was once offered as a Sew-op workshop but garnered little interest. Reply in the comments if you'd like to attend a live class on this topic.
Saturday, June 7, 2014
Get Scrappy
First, there's still plenty of room in my skirt drafting class, June 14th from 10-12, Upstairs at the Sew-op at the Upper Valley Food Co-op. You'll learn how to draft your own pattern and sew a basic a-line, elastic or drawstring waist skirt. It's an easy and fun class. It helps if you've had our Basic Sewing class or have similar experience. You can sign-up by the registers in the Co-op.
Scraps make great patches.
These little keychains are adorable and use very small scraps.
And kids will happily make use of any sized scrap. I used to make doll clothes from the 2"x2" fabric swatches my grandma used to to get. She lived on a farm in SD and ordered all her fabric by mail.
Still Larger Scraps
Once you have a piece of fabric about 3 or 4 inches square there are all sorts of small projects you can create.
You can make fabric rope from scraps
A cute, scrappy bracelet
Beanbag book ends are a creative idea
Or to make carrots
Check out my Pinterest board devoted to scrappy projects for more ideas. What do you do with your fabric scraps?
Scrap Busting
Every project creates scraps. Even the most carefully designed layout will result in scraps. And thread scraps are also unavoidable. Some professional crafters even sell their scraps. So what can be done with all those scraps?
Very Small Scraps
Visitors to the Sew-op may have noticed there are special buckets to collect very small fabric and thread scraps. It's partly for tidyness and convenience, but also that we could potentially do something with those scraps. Back before polyfil those scraps would be saved and used as stuffing for a pillow or doll or other stuffed thingy. Sawdust was also used as stuffing and while that is a fiber, it's not under this blog's umbrella. (Anyone know the expresion about feeling so worn out your sawdust is leaking from your stitches?) Anyway, at home I save those fabric and thread scraps in a box and I almost have enough for a small stuffie. Like maybe this one, a turtle pin cushin that is also made from scrap fabric. It makes for a lumpier look but it can be charming.Larger Scraps
Larger scraps, let's say at least 1 inch square, can be used in many ways.
Qulting them together to create a sort of fabric is an easy one and works with all shapes and sizes. http://stumblesandstitches.blogspot.com/2011/11/tutorial-scrappy-stocking-christmas.htmlScraps make great patches.
 |
| photo credit: kellyhogaboom via photopin cc |
These little keychains are adorable and use very small scraps.
And kids will happily make use of any sized scrap. I used to make doll clothes from the 2"x2" fabric swatches my grandma used to to get. She lived on a farm in SD and ordered all her fabric by mail.
Still Larger Scraps
Once you have a piece of fabric about 3 or 4 inches square there are all sorts of small projects you can create.
You can make fabric rope from scraps
A cute, scrappy bracelet
Beanbag book ends are a creative idea
Yarn Scraps
I don't knit or crochet, but of course those crafts also create scraps. Yarn and floss scraps can be saved as stuffing, used in kid projects, etc.Or to make carrots
Check out my Pinterest board devoted to scrappy projects for more ideas. What do you do with your fabric scraps?
Thursday, May 1, 2014
UV Craft Challenge 1: Fiddleheads Round-up
First, a little housekeeping. Summer is coming and to keep things easiest we've decided to limit the challenges to once a quarter. They will still run a full month and the next one will be in July with the topic to be announced in June. Feel free to comment with your ideas for future challenges.
Best I know, Rebecca and I were the only crafters this challenge. Both of us felt it was a great experience. I love how this encouraged me to be creative and flow with how things happened. I not only made a table runner, I also found enough fabric for a table cloth. Rebecca came up with two wonderful and very different projects for the challenge.

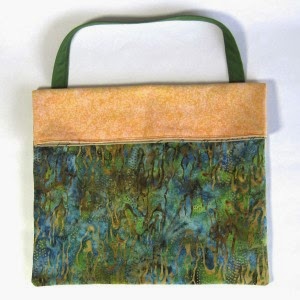


Best I know, Rebecca and I were the only crafters this challenge. Both of us felt it was a great experience. I love how this encouraged me to be creative and flow with how things happened. I not only made a table runner, I also found enough fabric for a table cloth. Rebecca came up with two wonderful and very different projects for the challenge.
If you created a fiddlehead project, or if you find time for a later project on this theme, please post in the comments. I still hope to play with my plastic bag idea and post those results so maybe I'll do a final round-up at the end of the quarter. Keep watch for the topic for July's UV Craft Challenge sometime in June.
UV Craft Challenge 1: Fiddleheads Craft
This has been an interesting project for me with a few twists and changes.
My first thought was to play with plastic packaging in place of rope in a sort of coiled coaster or trivet. And I still want to do that. But, after two weekends in a row of watching house guests slide serving dishes across our old (family heirloom) dining room table I decided a table runner was in order. Something cute, with good coverage, and knowing my family as I do, insulated. I'll still use trivets under hot serving dishes but I'll rest easier knowing there's a little extra protection. So I was leaning in the direction of something quilted.
I also wanted this project to use up as much stash fabric as possible and after some digging came up with this. It's like a very heavy linen with a tight weave and a nice fringe at the selvage.

Turns out, the fabric piece is large enough to be a tablecloth on it's own with plenty of fabric leftover to create my table runner. I think ideally this would be best with the fabric grain running the length of the table, but my extra fabric is on the end and it doesn't matter for this project. And the fabric is a bit too stiff for a quilting project. So I'll go with just a single layer of fabric and save a quilted runner for another day.
I ended up buying the fabric for the fiddlehead design because I didn't like what I had on hand.

The biggest challenge for me was the layout. I went back and forth between colors and sizes, symetrical and non-symetrical layouts until, after much fiddling (heh), I ended up with the layout below. The purple was nice but ended up looking too Easter-ish. The blue and yellow add interest while staying in the green family.

But how does this have anything to do with fiddleheads you ask? Like this.

I used a double-sided, fusible interfacing called Wonder-Under to attach my circles. First I ironed the interfacing to my circles. Then I cut them into spirals. Those are double cut to allow the base to show through. And then I ironed them to my fabric. My final step will be to fringe the sides of the entire runner. Or perhaps just run a stabilizing seam down both sides and see what happens.

My first thought was to play with plastic packaging in place of rope in a sort of coiled coaster or trivet. And I still want to do that. But, after two weekends in a row of watching house guests slide serving dishes across our old (family heirloom) dining room table I decided a table runner was in order. Something cute, with good coverage, and knowing my family as I do, insulated. I'll still use trivets under hot serving dishes but I'll rest easier knowing there's a little extra protection. So I was leaning in the direction of something quilted.
I also wanted this project to use up as much stash fabric as possible and after some digging came up with this. It's like a very heavy linen with a tight weave and a nice fringe at the selvage.
Turns out, the fabric piece is large enough to be a tablecloth on it's own with plenty of fabric leftover to create my table runner. I think ideally this would be best with the fabric grain running the length of the table, but my extra fabric is on the end and it doesn't matter for this project. And the fabric is a bit too stiff for a quilting project. So I'll go with just a single layer of fabric and save a quilted runner for another day.
I ended up buying the fabric for the fiddlehead design because I didn't like what I had on hand.
 |
| I got a little carried away cutting out circles. (I see many circle projects in my future!) |
The biggest challenge for me was the layout. I went back and forth between colors and sizes, symetrical and non-symetrical layouts until, after much fiddling (heh), I ended up with the layout below. The purple was nice but ended up looking too Easter-ish. The blue and yellow add interest while staying in the green family.
But how does this have anything to do with fiddleheads you ask? Like this.
I used a double-sided, fusible interfacing called Wonder-Under to attach my circles. First I ironed the interfacing to my circles. Then I cut them into spirals. Those are double cut to allow the base to show through. And then I ironed them to my fabric. My final step will be to fringe the sides of the entire runner. Or perhaps just run a stabilizing seam down both sides and see what happens.
Friday, April 4, 2014
UV Craft Challenge 1
 |
| photo credit: LexnGer via photopin cc |
Welcome to the UV Craft Challenge. We were inspired by Just Crafty Enough's Iron Craft challenges to create our own. Here at Upper Valley Fiber Crafts we'll be hosting a monthly challenge for anyone to join in. Sometimes there will be a theme and sometimes there will be a specific craft. We'll post our own interpretations of the challenge here at the blog and at the end of the month we'll have a round-up for you to show off your project.
So let's get started! April's UV Craft Challenge theme is fiddleheads. Fiddlehead ferns are a big Upper Valley tradition. One of the first signs of spring is seeing fiddleheads in the grocery stores and on restaurant menus. I'm not a fan of eating them, but I like the classic spiral shape and the fresh green color.
The spiral shape of a fiddlehead is an easy place to start for inspiration. Here's a coiled coaster project from Two Shades of Pink. And here's one made from denim scraps. Here's a pillow cover with spirals made from tee shirts.
The Koru is a Maori symbol inspired by the spiral of the New Zealand Silverback fern.
Here's a beautiful mitten pattern from Hello Yarn called the Fiddlehead.
I can't find the original image on the blog, but here is a pin of a stunning quilt with fiddleheads. I could see an embroidery piece being inspired by this.
We'll be posting our own ideas for this challenge. Post a comment if you will be following this challenge. I can't wait to see what you come up with.
Saturday, March 15, 2014
Pi Day Crafting
It shouldn't be news to anyone that if you type "pie" into the search function of Pinterest you get a whole lot of, well, pie. The edible kind, that is. But what I wondered is what types of crafts might be associated with this geekiest of holidays that celebrates the mathematical constant pi (3.14) on March 14th.
Pumpkin Pie Crafts has an easy and adorable kid's apron tutorial. And it gives me an opportunity for a shameless plug for my apron class on Saturday, April 5th from 10-12 at the Sew-op. It's a level 2 class (prior sewing experience helpful) that will teach you how to read and use a pattern, specifically a printable internet pattern, and create an apron. This past month at the Sew-op we've explored several different ways of making aprons and it's been a lot of fun.
Pumpkin Pie Crafts also has a quick tutorial for making a tie-front cardi out of a tee shirt. And a crochet flower headband.
A simple pi symbol on a tee shirt can be accomplished via sewing or painting or freezer paper stencil.
These patches remind me of these felt coastersfrom craft snob.
And finally, in honor of the edible type of pi or pie, my family's favorite pie recipe: Not Derby Pie.
Tuesday, February 11, 2014
Last Minute Valentine
I'm back with another post full of last minute gift ideas for you procrastinators out there. Valentine's Day is this Friday and there is still time to whip up a crafty gift for someone you love.
Sew Mama Sew has many fantastic gift ideas on their blog, but this idea for stitched cards attracts my eye because it is fast, creative and extremely portable. No sewing machine required.
I'm not much of a knitter but when I am tempted by a pattern it's usually for something useful. Like these adorable heart-shaped tawashis. These little scrubbies are another fast and easy project and a great way to use up scrap yarn.
This one is tougher to hide from your intended recipient. And perhaps a bit of a stretch for the topic of this blog but it uses yarn which is a fiber so... I'm in love with this sign idea and have one started for my dining room. I think you could easily craft a simpler version with a Valentine message in an evening of dedicated wrapping.
And finally, these little monster stuffies were featured in a workshop at the Sew-op as a last minute Christmas gift but they'd be equally welcome on Valentine's Day.
Wednesday, January 22, 2014
A Day for Quilting
You're probably not going to find a card for it at the card shop, but according to Brownielocks.com, January 25th is "Visit Your Local Quilt Shop Day." Here in the Upper Valley and surrounding area we have two fabric shops and two quilt shops where you can get your fabric fix on Quilt Shop Day.
Hen House Fabric
246 Holiday Dr, White River Jct, VT 05001
(802) 295-4436
Fabric Dicor
19 Hartland Hill Rd Hartland, VT 05048
(802) 436-7939
Barnyard Quilting
232 US RT 5 North, Fairlee, VT 05045
Phone: (802) 333-3566
Four Pines Quilting
38 Summer St Claremont, NH 03743
(603)543-3311
The Sew-op in the Upper Valley Co-op offers quilting classes. And as Rebecca mentioned earlier, Our Savior Lutheran Church of Hanover holds Disaster Relief Quilting sessions twice a month.
On the web, Sew Mama Sew is running a month-long series on quilting that features patterns, techniques and an in-depth look at "31 Inspiring Quilters."
Erin from House on Hill Road creates beautiful quilts and provides tutorials on projects and cutting techniques.
And my other favorite quilting blogger is Blair from Wisecraft. Who also provides helpful tutorials and creates lovely quilts.
Thursday, November 28, 2013
Holiday Project Round-up
If you're a crafter, you're probably often tempted to make what you need or want instead of buying it. But there's only so much time for projects, so how do you decide what to make and what to buy? The Modern Mrs Darcy has created a flowchart to help you decide.
Sew Mama Sew is just finishing up their 7th Annual Homemade Holidays round-up. Each day features easy to make gift projects along a theme plus printables, recipes and books. There are tons of gift ideas for everyone. Don't forget to check out past archives as well. I love these scrappy ornaments.
Coasters are an easy gift idea. They're small, and fast and don't take much fabric. If you're feeling ambitious you could stretch the size and technique to sew matching trivets, pot holders, napkins, placemats, table runner or even a throw pillow. Here's a round-up from Apartment Therapy. I like the felt coasters from craft snob. Pefect for my long ride to Grandma's house this Thanksgiving.
Happy Thanksgiving and safe travels, everyone!
Subscribe to:
Posts (Atom)